Define specific time slots and available days for booking meetings.
Steps to Set Up Availability:
Navigate to Availability Tab:
- In the meeting settings, click on the ‘Availability’ tab.
Select Available Date Range:
- Choose the date range during which bookings will be available.
Enable Days for Booking:
- Toggle the switch next to each day (e.g., Sunday, Monday) to enable or disable availability for that day.
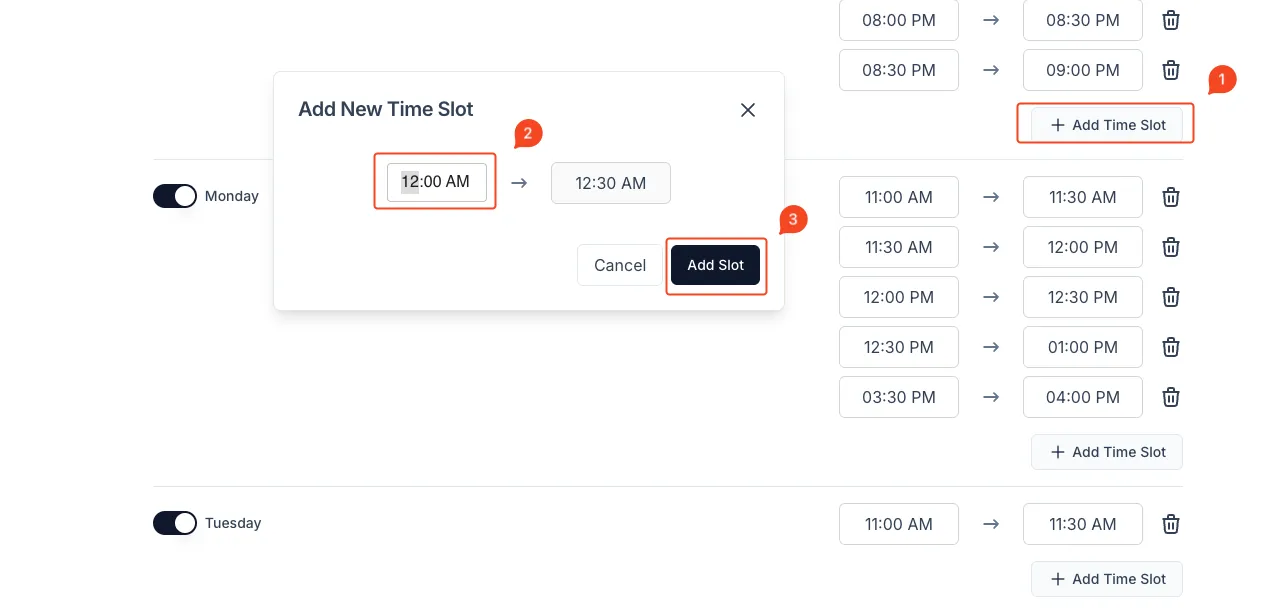
Add Time Slots:
- Click on the ‘+ Add Time Slot’ button.
- In the pop-up window, select the Start Time and End Time.
- Click ‘Add Slot’ to save the time slot.
Delete Time Slots (Optional):
- Click on the Trash Icon next to an existing time slot to remove it.
Save Changes:
- Once your availability is configured, it will be save automatically.
Best Practices:
- Add multiple time slots to accommodate varying schedules.
- Regularly review availability settings to ensure accuracy.
- Avoid overlapping time slots.
That’s it! Your meeting availability is now set up and ready for booking.