Creating a support ticket is the first step to resolving customer issues effectively. This guide walks you through the process of creating a new support ticket in your system.
Steps to Create a Support Ticket:
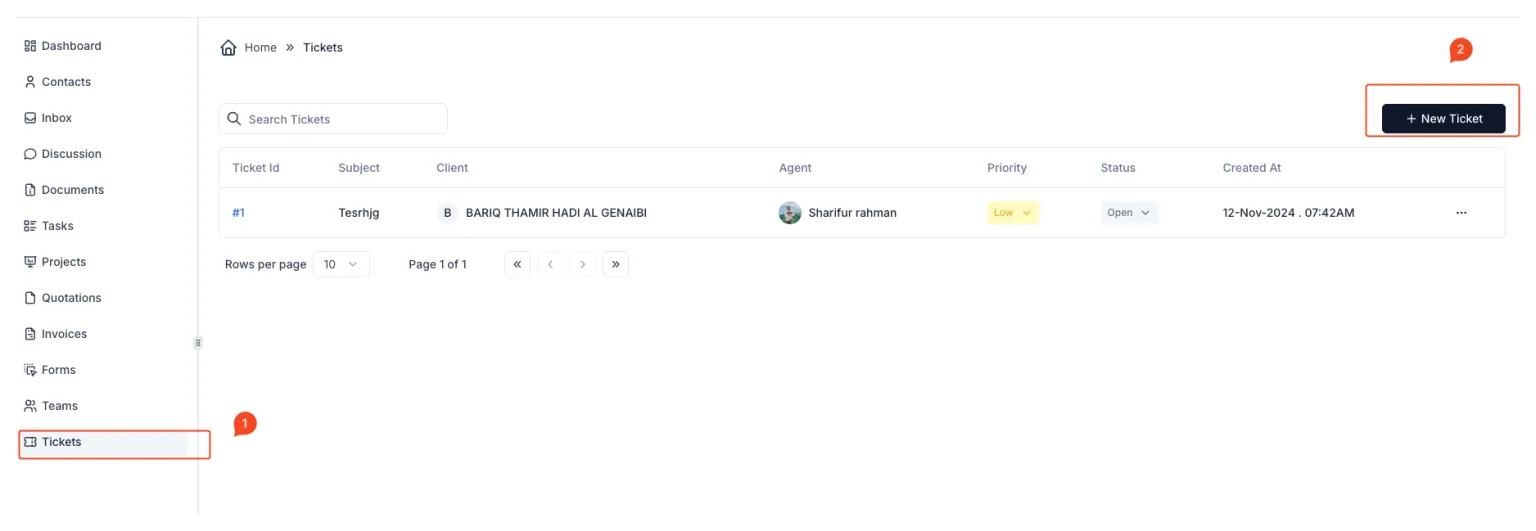
- Navigate to the Tickets Section:
- From the sidebar menu, click on Tickets to access the tickets dashboard.
- Initiate a New Ticket:
- On the tickets dashboard, click the + New Ticket button located at the top-right corner of the screen.
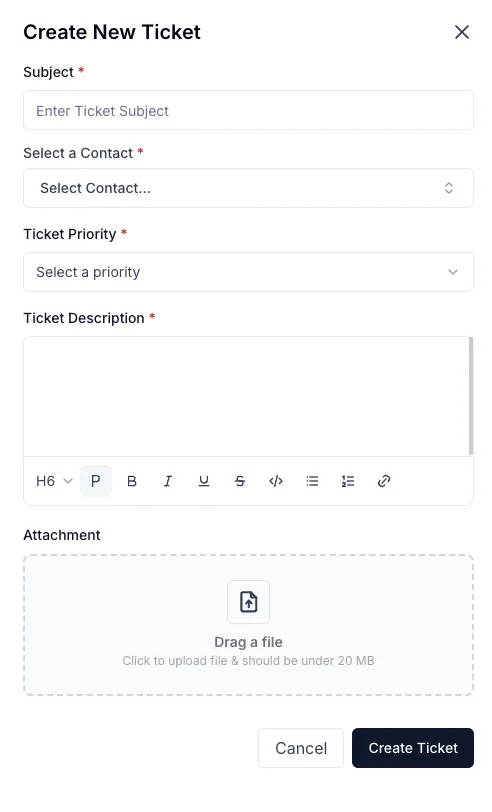
- Fill Out the Ticket Details:
- A form will appear for creating the new ticket. Complete the required fields as described below:
- Subject: Enter a concise and descriptive title for the ticket (e.g., “Login Issue”).
- Select a Contact: Choose the client or customer from the dropdown list.
- Ticket Priority: Select the priority level for the ticket (e.g., Low, Medium, High, Critical).
- Ticket Description: Provide detailed information about the issue or request in the description field.
- Attachment (Optional): If applicable, upload files (e.g., screenshots or documents) by dragging and dropping them into the attachment area or clicking to upload.
- A form will appear for creating the new ticket. Complete the required fields as described below:
- Submit the Ticket:
- Once all required fields are completed, click the Create Ticket button to submit the ticket.
- The system will save the ticket and display it in the tickets list for further action.
Additional Notes:
- Attachments: Ensure uploaded files are within the size limit (e.g., under 20 MB).
- Priority: Use the priority field to categorize tickets based on urgency for better management.
- Confirmation: After creating the ticket, it will appear in the tickets list with the assigned Ticket ID.
By following these steps, you can create a support ticket to initiate the resolution process effectively and ensure customer issues are managed systematically.