
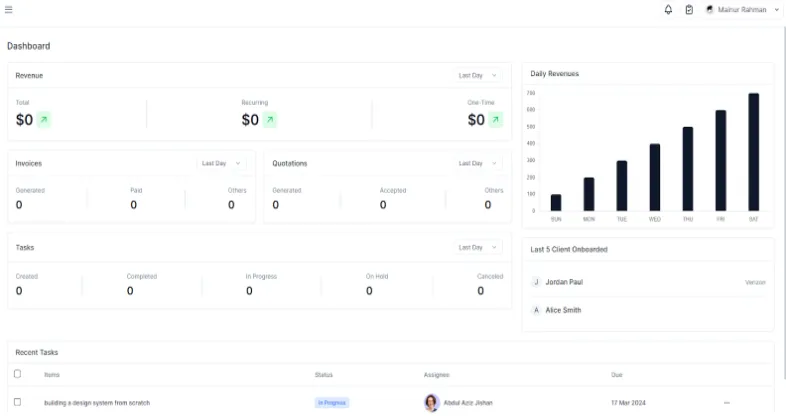
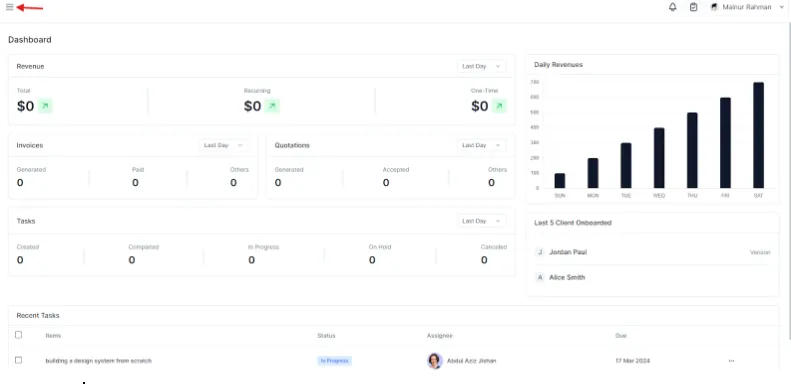
Once you have successfully logged in to your Taskip account, you’ll be redirected to your account dashboard. Here you can see a bunch of analytics like your total revenue, daily revenue, generated invoices, quotations, recent tasks, ongoing tasks and so much more. To navigate to a different tab, click on the hamburger menu icon on the top left corner of the site to expand the sidebar.
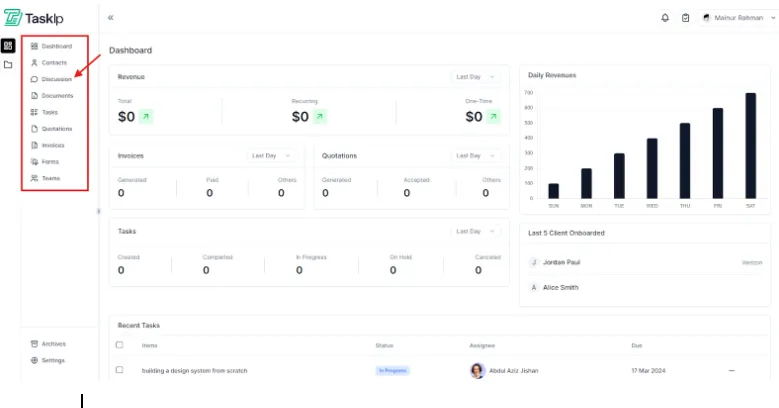
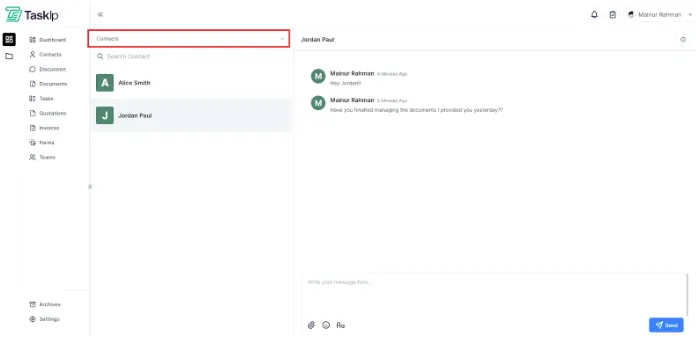
From the sidebar, we need to click on the ‘Discussion’ icon to go to the discussion tab. Within this tab, you can see there is a search bar on the left panel from where you can add contacts to start texting them right away. You can add as many contacts you want from your ‘contacts’ list. The panel on the right shows your text area on top. Below is the text box where you type in your texts to send to the contact.
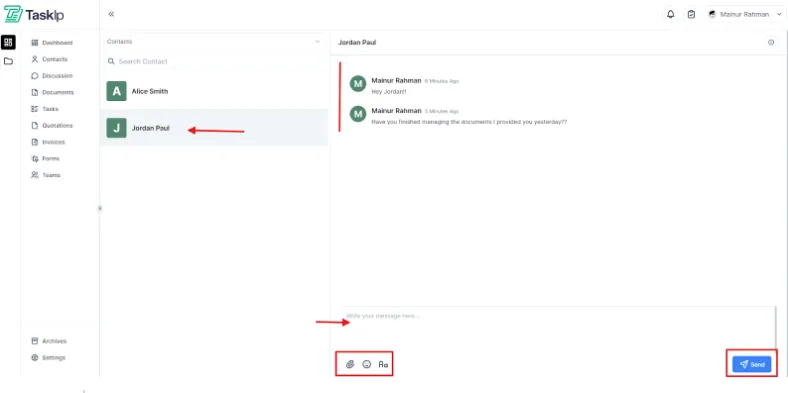
There are also options to attach documents and add emojis to your texts. Besides, you can make your texts ‘bold’, ‘italic’, ‘underline’, ‘strikethrough’ as well as attach bullet points and and check boxes to your texts using the (Aa) icon beside the emoji icon. Click on the blue ‘Send’ icon to send your texts. Clicking on the dropdown menu above the search bar on the left panel where it says ‘Contacts’, you will see another option called ‘Conversations’.
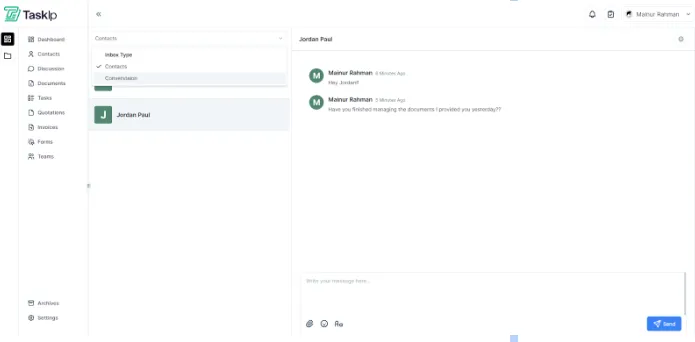
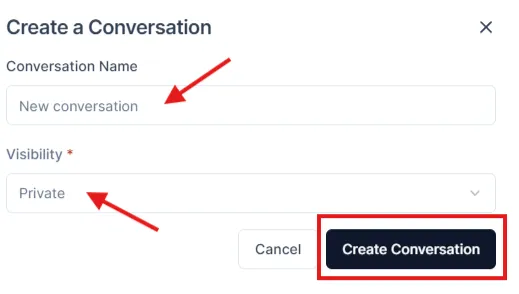
From here, you’ll be able to create a group by clicking the (+) icon beside the search bar and add people to the group. You need to give the group discussion a name and set visibility.
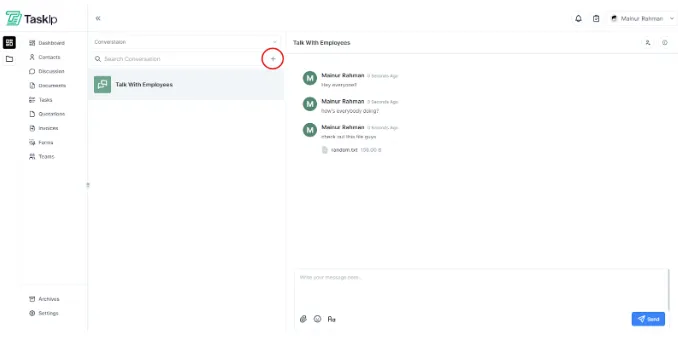
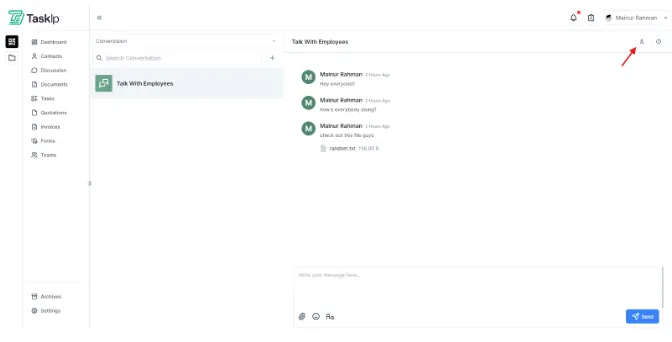
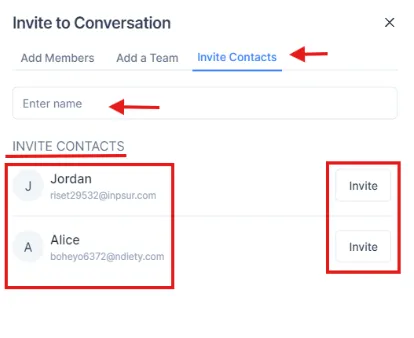
To add people to the created group discussion, you need to click on this invite contact icon. After that a new window will pop-up through where you can see the current members under the ‘Add Members’ tab. Click on the ‘Invite Contacts’ tab to invite your preferred contacts to the group.
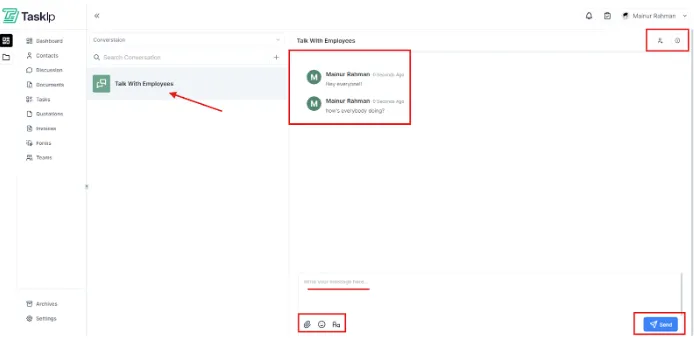
Now, you can start discussing anything you want with the people you just added by typing in the text box on the right panel.
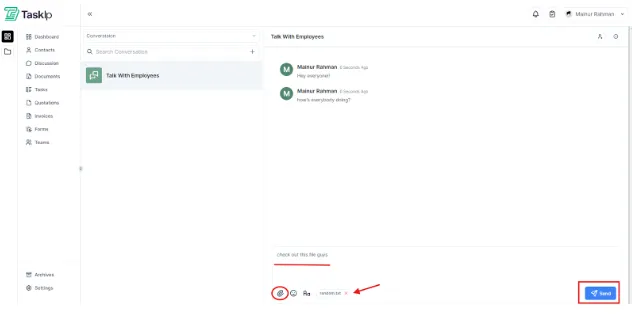
You can drag and drop a file (having .jpeg, .png, .gif, .svg, .mp4, .mov, .pdf, .doc, .doc, .docx, .xls, .text, .txt extensions) and send it to the group.
To view the attached files, you can click on the ‘i-button’ beside the add member icon and then click on the ‘Files’ tab.
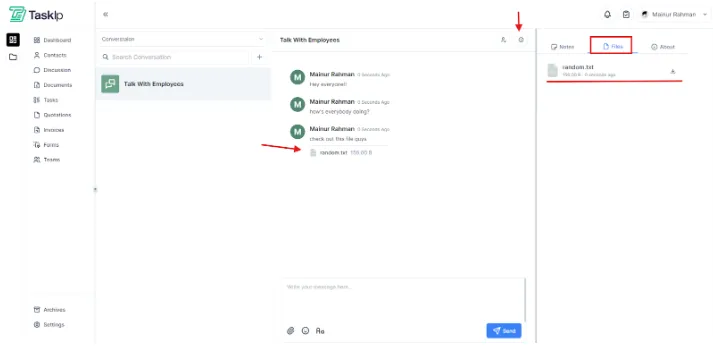 ****
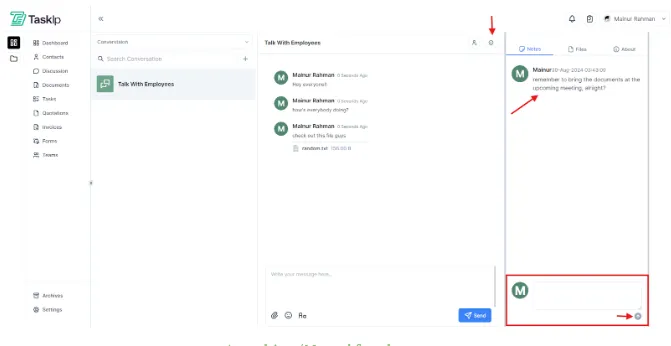
You can also add important notes for the group for a ‘Reminder’ maybe…
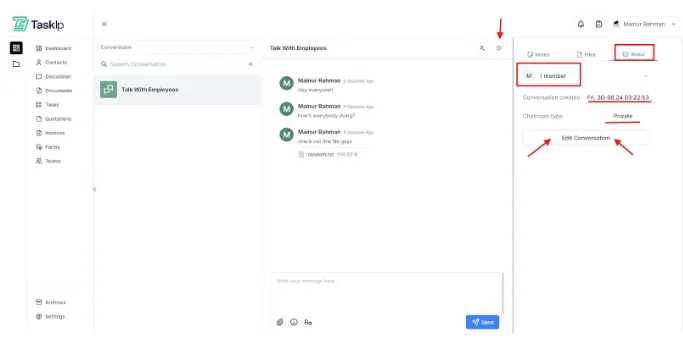
On the ‘About’ section, you can see details of the group like number of members, date and time the group conversation was created as well as the conversation visibility.
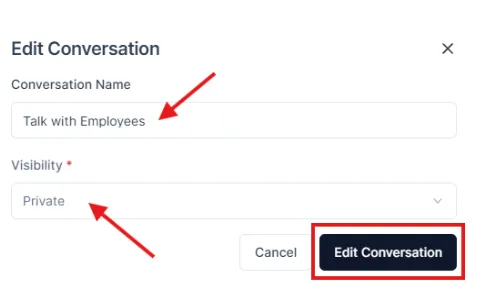
You can edit the conversation details by clicking the ‘Edit Conversation’ button. In the new window, provide the conversation name and set the visibility to either private or public.
Online Status and Starting a Chat Quickly
Every teammate's avatar carries a small status dot — green means they're active right now, gray means they're offline. You'll see it next to names in the conversations list, in a channel's member list, on a person's messages, and at the top of a direct message, where it's paired with an "Active now" or "Offline" label.
Clicking on a teammate's name or avatar anywhere in Discussions (a channel member, a message sender, or an @mention) opens a quick info card with their role and status. If you're not already messaging that person, the card includes a Start Chat button that opens a direct message with them immediately, no need to go through Create a Conversation first.
Your online status and read/unread state stay in sync across every device and browser tab you're logged into, so a conversation you read on your phone shows as read on your desktop too.