Adding notes to support tickets is a crucial feature for tracking updates, sharing internal information, and providing additional context for resolving issues. Here’s a step-by-step guide to help you add notes to a support ticket in your system.
Steps to Add Notes to a Support Ticket:
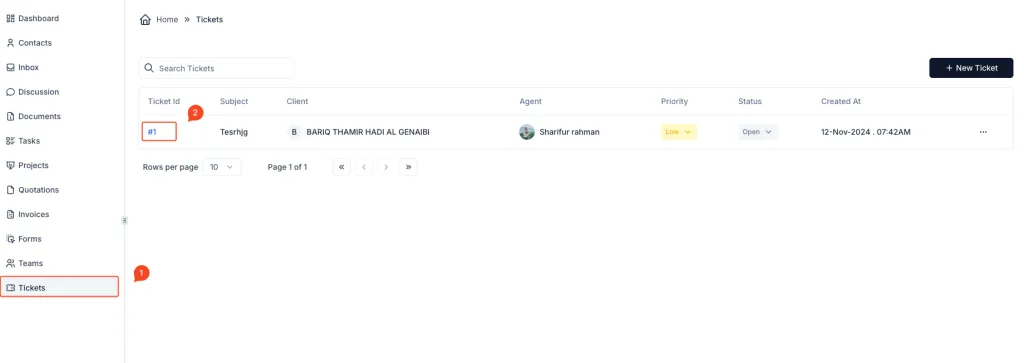
- Access the Tickets Section:
- Navigate to the Tickets section in the sidebar menu.
- This will display a list of all active and resolved tickets.
- Open the Desired Ticket:
- Locate the ticket to which you want to add a note.
- Click on the Ticket ID (e.g.,
#1) to open the detailed view of the ticket.
- Go to the Notes Tab:
- Within the ticket details page, locate the Notes tab on the right side of the screen.
- Click on this tab to view all existing notes or add a new note.
- Add a New Note:
- In the Notes section, type your note in the provided input box.
- Ensure that the note is clear, concise, and contains all relevant information.
Example:
Follow up with the client to confirm additional details about the reported issue.
- Save the Note:
- Once you’ve written your note, click the Save button (or its equivalent) to save it.
- The note will be added to the ticket and displayed along with the timestamp and the name of the person who added it.
- Review Existing Notes:
- After saving, the note will appear in the list of notes under the Notes tab.
- You can view the history of all notes added to the ticket for reference.

Benefits of Adding Notes:
- Enhanced Collaboration: Notes allow team members to share updates and insights about the ticket internally.
- Improved Tracking: Keep a detailed record of all actions taken or updates related to the ticket.
- Organized Support: Ensure all team members are aligned with the current status of the ticket.