Webhooks allow your application to receive real-time HTTP notifications whenever specific events occur within Taskip. Instead of repeatedly polling the API for changes, you can configure webhook endpoints that Taskip will call automatically when a subscribed event is triggered.
This enables seamless integration with third-party services, automation platforms (such as Activepieces, Zapier, or Make), and your own custom applications.
Getting Started
To access the Webhook Settings page, follow these steps:
Log in to your Taskip workspace.
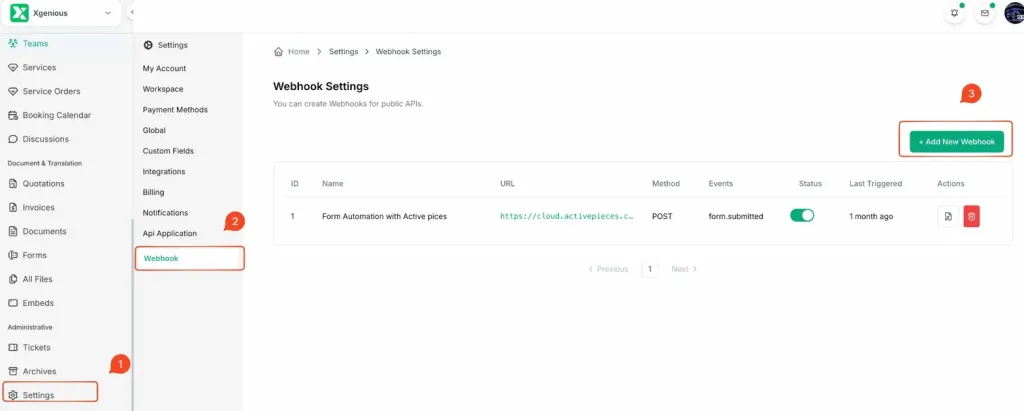
Click on Settings in the left sidebar menu.
In the Settings sub-menu, click on Webhook.
You will see the Webhook Settings page with a list of your existing webhooks (if any).\
 \
\
Webhook Settings Overview
From this page, you can view all configured webhooks along with their ID, Name, URL, HTTP Method, subscribed Events, Status, and Last Triggered timestamp.
How to Add a New Webhook?
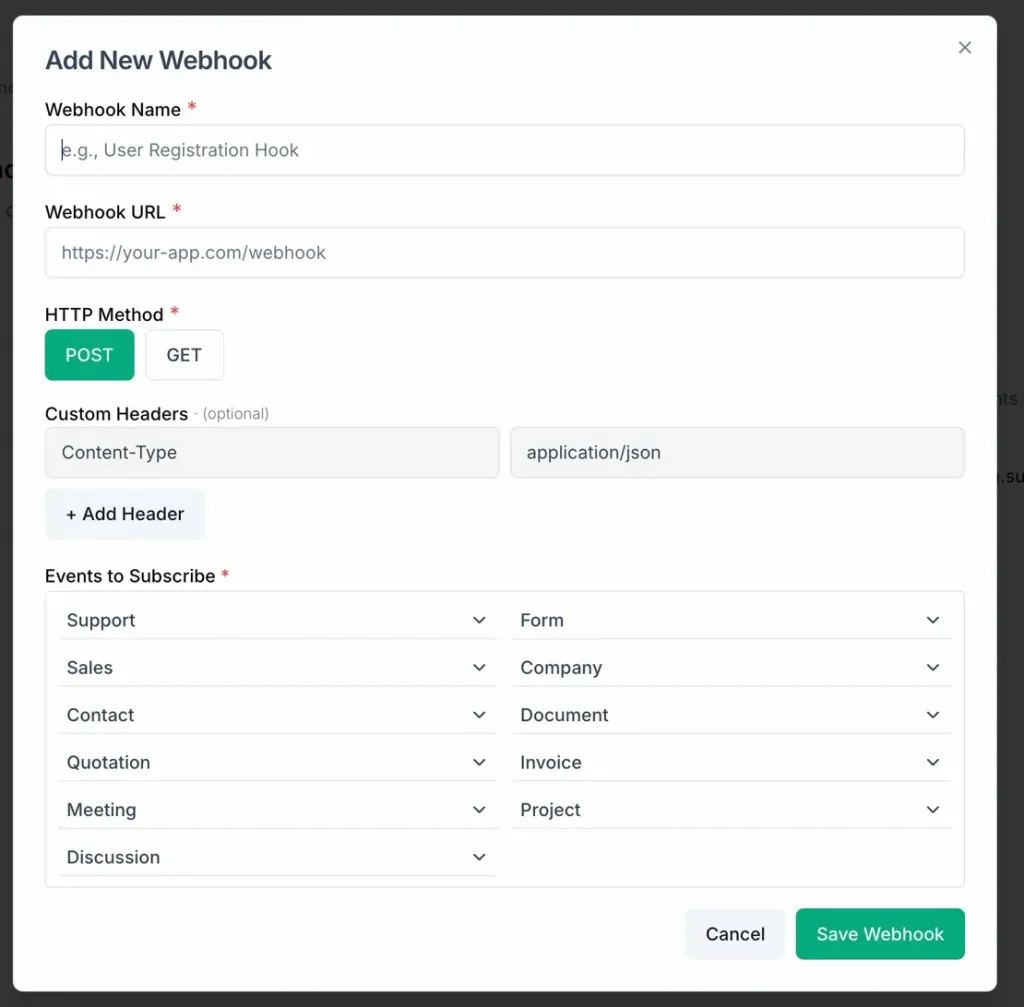
To create a new webhook, click the + Add New Webhook button at the top-right corner of the Webhook Settings page. A dialog box will appear with the following fields:
Webhook Name
A descriptive label for your webhook (e.g., User Registration Hook or Form Automation with Activepieces). This name is for your own reference and helps you identify the webhook in the list.
Webhook URL
The destination endpoint URL where Taskip will send the HTTP request when the event occurs. This must be a publicly accessible HTTPS URL. For example: https://your-app.com/webhook
HTTP Method
Choose the HTTP method for the webhook request. The available options are:
- POST – Sends event data in the request body (recommended for most use cases).
- GET – Sends event data as query parameters in the URL.
Custom Headers (Optional)
You can add custom HTTP headers to the webhook request. This is useful for authentication or specifying content types. Each header consists of a key-value pair. For example:
Content-Type : application/json
Click Add Header to include additional headers as needed.
Events to Subscribe
Select which events should trigger the webhook. Events are organized by category. Each category dropdown allows you to subscribe to one or more specific events. A full reference of available events is provided in the next section.
Once you have filled in all required fields, click Save Webhook to create the webhook. It will appear in the list on the Webhook Settings page with its status set to active by default.
How to Manage Webhooks?
Managing webhooks in Taskip allows you to control how and when your integrations are triggered. You can easily enable, disable, edit, or delete webhooks based on your needs, while also monitoring their activity.
How Does It Work?
Each webhook in the Webhook Settings page comes with action controls that let you manage its behavior. You can update configurations, control its active status, or remove it entirely.
How to Manage Webhooks?
- Click on Webhook to open the Webhook Settings page.
- Log in to your Taskip account.
- Go to Settings from the main menu.
- Here, each webhook provides the following options:
- Status Toggle: Use the toggle switch to enable or disable a webhook without deleting it.
- *Edit Webhook: Click the Edit icon to modify details such as:*
- Name
- URL
- HTTP Method
- Headers
- Subscribed Events
- Delete Webhook: Click the Delete (trash) icon to permanently remove a webhook.
- View Activity: Check the Last Triggered column to see the most recent time the webhook was executed.