Managing the status and priority of support tickets is essential for organizing workflows and resolving customer issues efficiently. Here’s a step-by-step guide on how to modify the status and priority of a support ticket.

Steps to Change Ticket Status or Priority:
- Navigate to the Tickets Section:
- Click on the Tickets option in the sidebar menu.
- This will display a list of all tickets along with their details such as status, priority, and agent.
- Open the Ticket Details:
- Find the ticket for which you want to change the status or priority.
- Click on the Ticket ID (e.g.,
#1) to open the ticket’s detailed view.
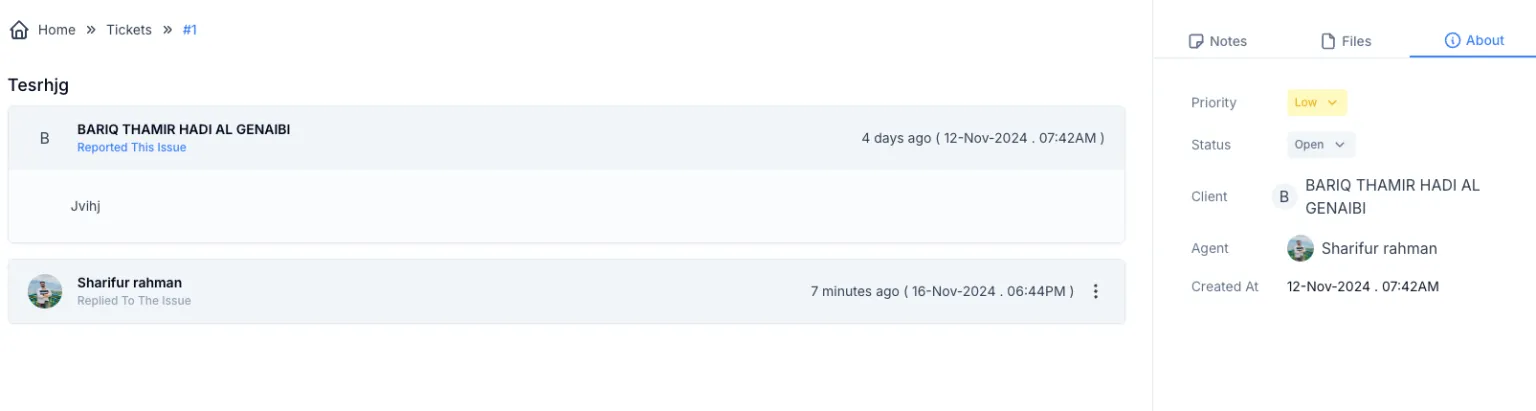
- Go to the About Tab:
- Once the ticket details page is open, locate the About tab on the right side of the screen.
- This section displays ticket-related information like priority, status, client details, assigned agent, and creation date.
- Change the Priority:
- In the Priority field, click the dropdown menu.
- Select the appropriate priority level (e.g., Low, Medium, High, Critical) based on the urgency of the ticket.
- Update the Status:
- In the Status field, click the dropdown menu.
- Choose the new status for the ticket (e.g., Open, In Progress, Resolved, or Closed) to reflect the current stage of resolution.
- Changes Are Automatically Saved:
- Once you select a new value for the Priority or Status, the changes are automatically saved and updated in the system.
Benefits of Updating Status and Priority:
- Efficient Issue Management: Helps in categorizing and prioritizing tickets for faster resolution.
- Better Team Collaboration: Provides clarity to the team about the urgency and progress of each ticket.
- Improved Customer Satisfaction: Keeps ticket resolutions aligned with customer expectations by ensuring timely updates.